

Imagine watching an entire day fly by in just 30 seconds. A flower blooming, a construction project soaring skyward, or stars dancing across the night sky. A time lapse camera is the exact tool that makes this magical spectacle possible.
By taking still images at regular intervals and then stitching them together into a video, the camera compresses long periods of time into a short and fascinating film.
What is a time lapse camera, exactly?
Think of it as an extremely patient photographer who automatically snaps a picture at regular intervals—sometimes for hours, days, or even weeks. Each individual photo then becomes a frame in the finished movie.
When hundreds or thousands of images are played back in rapid succession, usually at 24 or 30 frames per second, it creates the illusion of time fast-forwarding. It is a simple yet incredibly powerful principle that allows us to see processes that are far too slow to be perceived by the naked eye. The magic lies in the interval—the time between each shot—which determines exactly how fast time will appear to move in the final result.
The right tool for the job
There are several ways to create time lapse films, and each tool has its own pros and cons. Understanding the differences is essential for choosing the right equipment for your specific project.
-
Dedicated time lapse camera: These are purpose-built for one thing, and they do it incredibly well. They shine with exceptional battery life that can last for weeks or months, rugged and weather-resistant housings, and a super-simple interface. Perfect for long-term projects like construction sites or nature documentation where you just want to set it up and let it run itself.
-
System camera (DSLR/Mirrorless): Do you want the absolute highest image quality and full creative control? Then this is the option for you. You can fine-tune everything—aperture, shutter speed, ISO—to get exactly the look you want. The downside is that it requires more knowledge, larger battery solutions for long sessions, and they are often sensitive to the elements.
-
Smartphone: This is by far the easiest and most accessible option. Modern phones often have built-in time lapse modes that are ridiculously simple to use for shorter clips, like a sunset or clouds moving across the sky. However, battery life and the lack of manual settings quickly set limits.
Don't forget action cameras! Many modern models have highly advanced time lapse features that make them a versatile and durable choice. You can learn more in our complete guide on choosing the right action camera.
Simply put: A dedicated camera almost always wins when it comes to endurance and simplicity for long projects. A system camera, on the other hand, offers unbeatable creative control for those who want to polish every detail.
Choosing the right time lapse camera for your projects
Finding the perfect time lapse camera can feel like a jungle of technical terms and different models. But don't worry—it's not about finding the absolute "best" camera, but the one that's best for you and what you want to create. It all starts with a few simple questions.
Are you documenting a house build spanning six months, or do you want to capture a magical sunset over one hour? The answer to that question directly dictates which features will be most important to you.
Resolution is more than just pixels
Resolution is fundamentally about detail. Today, 4K (approximately 8 megapixels) is a fantastic standard that gives you pin-sharp videos that look incredible on modern screens. A major advantage is also that it gives you more room for maneuver in editing—you can zoom in and pan within the image without losing quality.
But keep in mind that higher resolution eats up storage space. An hour of 4K video can quickly fill a memory card, so make sure the camera you choose can handle large SD cards.
Battery life – the secret behind long projects
For a shorter project, like filming the movement of clouds for an hour, most built-in batteries will do. But when you tackle projects spanning several days, weeks, or even months, battery life becomes the single most important piece of the puzzle.
This is where a dedicated time lapse camera often excels. Many models are built for extremely low power consumption and can chug along for months on a single set of batteries. If you're using a system camera or action camera, an external power source, such as a power bank or AC adapter, is almost always a must for longer sessions.
Constantly worrying about the battery is a creative killer. Choose a solution that lets you focus on your subject, not the power supply.
Weather protection and durability
Will the camera be sitting outside through rain and debris? Then weather protection isn't a bonus—it's a necessity. Look for an IP rating, which tells you how well the camera stands up to dust and water.
A rating like IP66 means the camera is completely dust-tight and can handle powerful jets of water. This provides peace of mind, allowing you to leave the equipment out in any weather. If your camera lacks built-in protection, a custom-fitted weather housing can be a smart investment. Many action cameras are also built to take a beating, making them popular for outdoor use. Learn more about which models perform best in our comprehensive best action camera test.
![]()
The image above gives a good indication: the length of the project, the environment, and how simple you want the process to be will point you in the right direction.
Comparing different camera types can also make the choice easier. Here is a quick overview of their strengths and weaknesses specifically for time lapse photography.
Comparison of camera types for time lapse
| Feature | Dedicated Time Lapse Camera | System Camera (DSLR/Mirrorless) | Smartphone |
|---|---|---|---|
| Battery Life | Superior (weeks/months) | Limited (hours, requires external power) | Very limited (requires external power) |
| Weather Protection | Often built-in (high IP rating) | Usually requires extra housing | None/limited, very sensitive |
| Simplicity | Very simple ("set and forget") | Requires more knowledge and settings | Easy to start, but limited settings |
| Image Quality | Good to very good | Potentially best (large sensors) | Good in daylight, worse in low light |
| Flexibility | Fixed to one lens | Total freedom with interchangeable lenses | Fixed to built-in lenses |
| Price | Medium | Highest (camera + lenses) | Lowest (if you already own one) |
As the table shows, there is no single "best" choice—it all depends on your priorities. The dedicated camera wins on endurance, while the system camera offers unbeatable creative control.
The lens's role in visual expression
The lens is the camera's eye and shapes the entire feel of your film. Two concepts are good to keep track of: focal length and aperture.
- Focal length: Measured in millimeters (mm) and determines how much you fit in the frame. A low number (e.g., 16 mm) provides a wide angle, perfect for landscapes. A high number (e.g., 100 mm) zooms in and highlights details.
- Aperture: Measured in f-stops (e.g., f/2.8). A lower f-number means a larger light opening, which is worth its weight in gold when shooting in poor light, such as starry nights or at dusk.
In summary, let your projects guide your camera choice. Consider resolution, battery life, durability, and lenses to find a model that doesn't just work today, but one you can grow with tomorrow.
Achieving the perfect time lapse – here are the settings you need
Having a good time lapse camera is one thing, but truly mastering it is quite another. The settings are where the magic happens. It's the small adjustments that separate a shaky amateur film from a professional and captivating work. Now we'll dive into the technical details and see how you turn your still images into an impressive movie.
The heart of all time lapse photography is the interval—the pause between each picture the camera takes. This choice sets the entire pace of your film and is absolutely crucial for capturing movement beautifully. A poorly chosen interval can make a slow process look jerky or turn a fast event into a single blurry mess.
Finding the right interval is more of an art than a science, but here are some solid rules of thumb to start with:
- Fast movements (racing clouds, crowds): A short interval of 1–3 seconds captures everything smoothly and evenly.
- Medium-paced movements (a sunset, moving shadows): An interval of 5–15 seconds works perfectly here to compress time just enough.
- Slow processes (a construction project, a flower blooming): For events spanning days or weeks, you might need an interval of several minutes.
Manual settings are your best friend
The most important piece of advice? Skip auto mode entirely. To create a serious time lapse, manual mode (M) is a must. The reason is simple: you want every image to have the exact same exposure to avoid that dreaded "flicker"—annoying and sudden lighting changes in the finished video.
By locking all settings manually, you take full control. This guarantees a smooth and consistent video, even if the light changes while you're filming.
Start by setting these three pillars:
-
Shutter Speed: This controls how long the camera sensor is exposed to light. A longer shutter speed (like 1 second) provides a nice motion blur that makes moving objects like cars and clouds look smoother and more cinematic. To be able to use long shutter speeds in daylight, you may need a variable ND filter, which acts like a pair of sunglasses for your lens.
-
Aperture (f-stop): The aperture affects both light intake and depth of field. A higher f-number (e.g., f/8 or f/11) provides a greater depth of field, meaning more of the image will be sharp, from foreground to background. This is almost always what you want in landscape shots.
-
ISO: The ISO value determines how light-sensitive the sensor is. Keep it as low as possible (ideally ISO 100) to get a clean image with minimal noise. Only raise the ISO if it's dark and you can't compensate with a longer shutter speed or wider aperture.
And for heaven's sake, don't forget the white balance! Set it manually to "sunny" or "cloudy" instead of auto. This prevents the colors from jumping between frames. Once you've taken control of these settings, you've given your time lapse camera the best possible chance to create something truly spectacular.
Inspirational ideas for your next time lapse
Once you've gotten the hang of the settings on your time lapse camera, a whole new world of creative possibilities opens up. The technology is tailor-made for capturing processes that are otherwise invisible to the eye, from nature's epic spectacles to the pulsing life of the city.
Let's look at some ideas that might spark the flame for your next project.
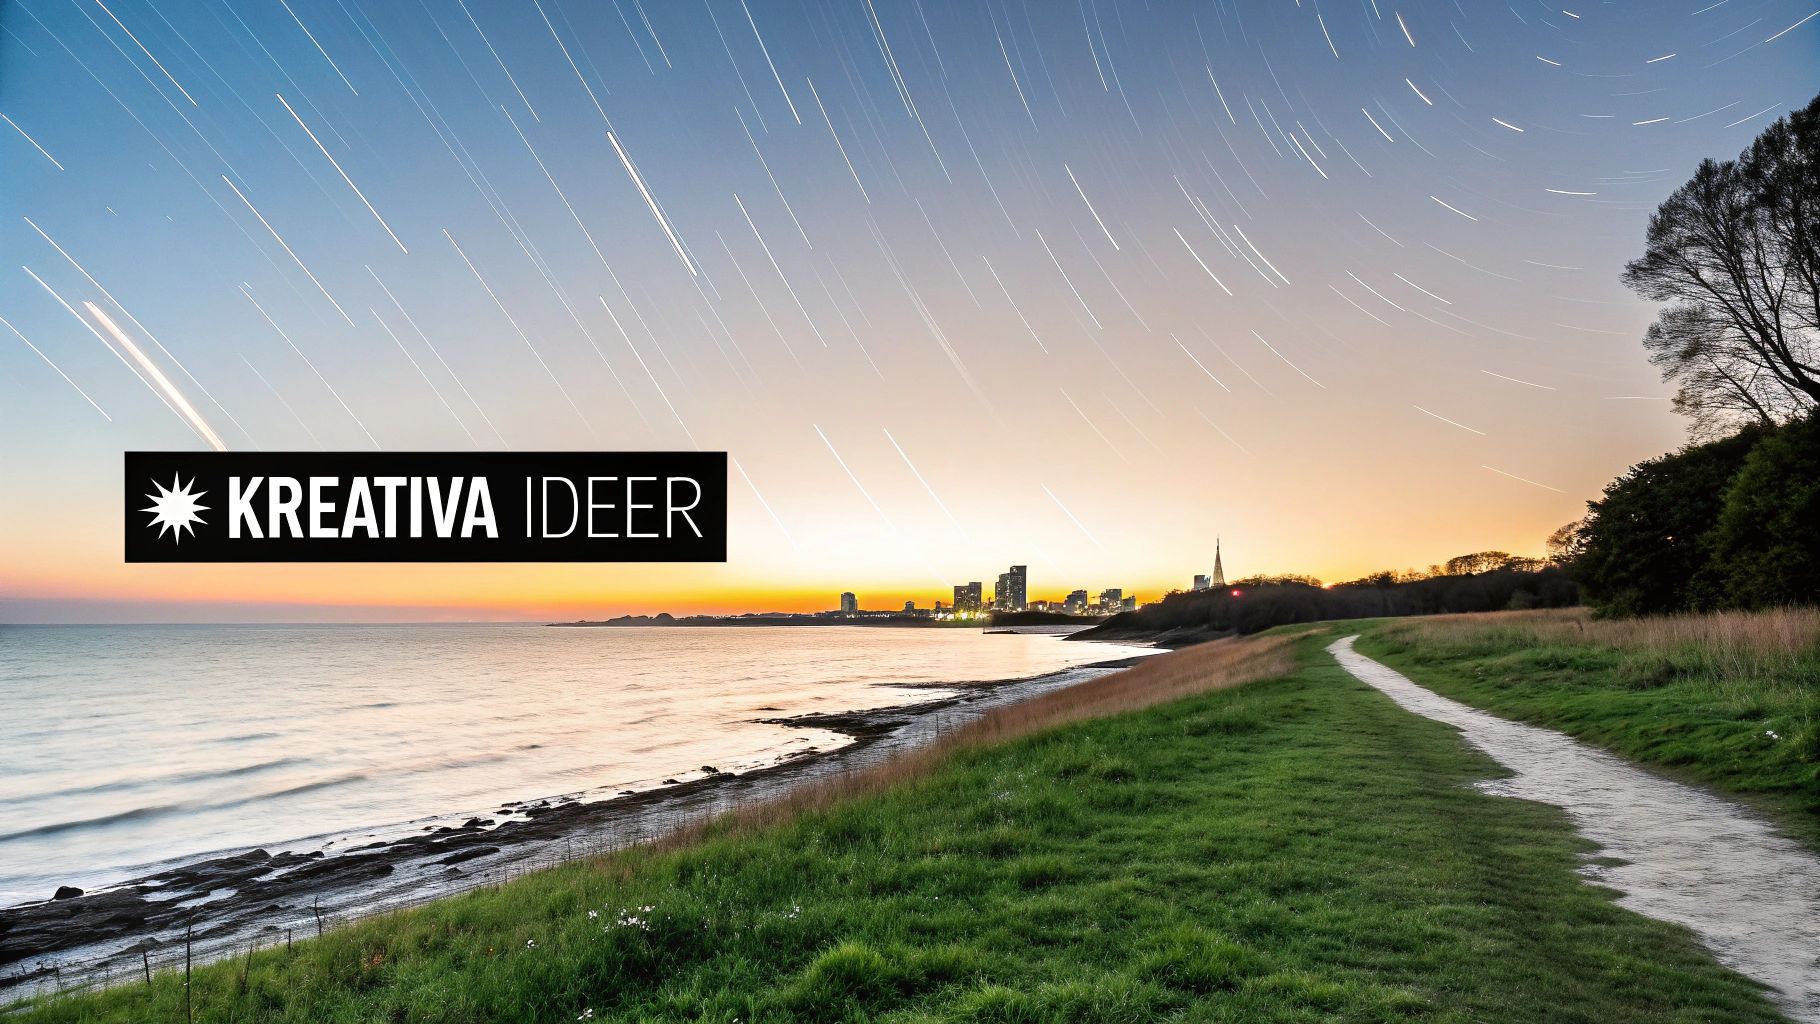
Nature is an inexhaustible source of inspiration. Point the camera at the sky on a starry night to capture the slow dance of the Milky Way or the circular star trails around the North Star. A sunrise or sunset is a classic for a reason—seeing the sky explode in color in just a few seconds is always fascinating.
Explore the slow rhythm of nature
Nature's own processes offer endless subjects for the patient photographer. Documenting landscapes and environmental changes actually has a long tradition. Already in the 1960s and 70s, when equipment became more accessible, photographers began using time lapse to track nature's shifts—an interest that has grown strong ever since the Swedish Society for Nature Conservation was founded in 1909.
Today, you can continue that tradition with your own camera. Here are some projects guaranteed to yield fantastic results:
- Plant life cycle: Set up the camera indoors and capture a flower blooming, or a chili plant growing from seed to fruit. This requires a long interval and a lot of patience, but the result is magical.
- Cloud formations: A windy day is perfect for capturing dramatic clouds sweeping across the sky. Use a short interval (1–3 seconds) to create a sense of speed and motion.
- Tidal movements: If you are by the coast, you can document the water rising and falling over several hours. This creates a calm and almost hypnotic effect.
A tip for nature photography is to always keep an eye on the weather. A sudden downpour can ruin both your equipment and your project, so make sure the camera is properly protected if it's going to be outside for a long time.
Capture the city pulse and human projects
Urban environments are full of energy and movement, making them perfect subjects for a time lapse. From a high vantage point, you can capture the light trails of traffic winding through the streets at night, or watch a crowd fill a square ahead of a concert.
Another popular application is documenting construction projects. By placing a camera that takes a picture every half hour for several months, you can compress the entire building process into an impressive film of just a few minutes. This technique is often used in the construction industry to visualize progress for clients and stakeholders.
Even smaller projects can be captivating. Why not document the assembly of a complicated piece of furniture, a 3D print taking shape layer by layer, or an artist creating a work from a blank page to a finished masterpiece? The possibilities are endless once you start seeing the world through the lens of your time lapse camera.
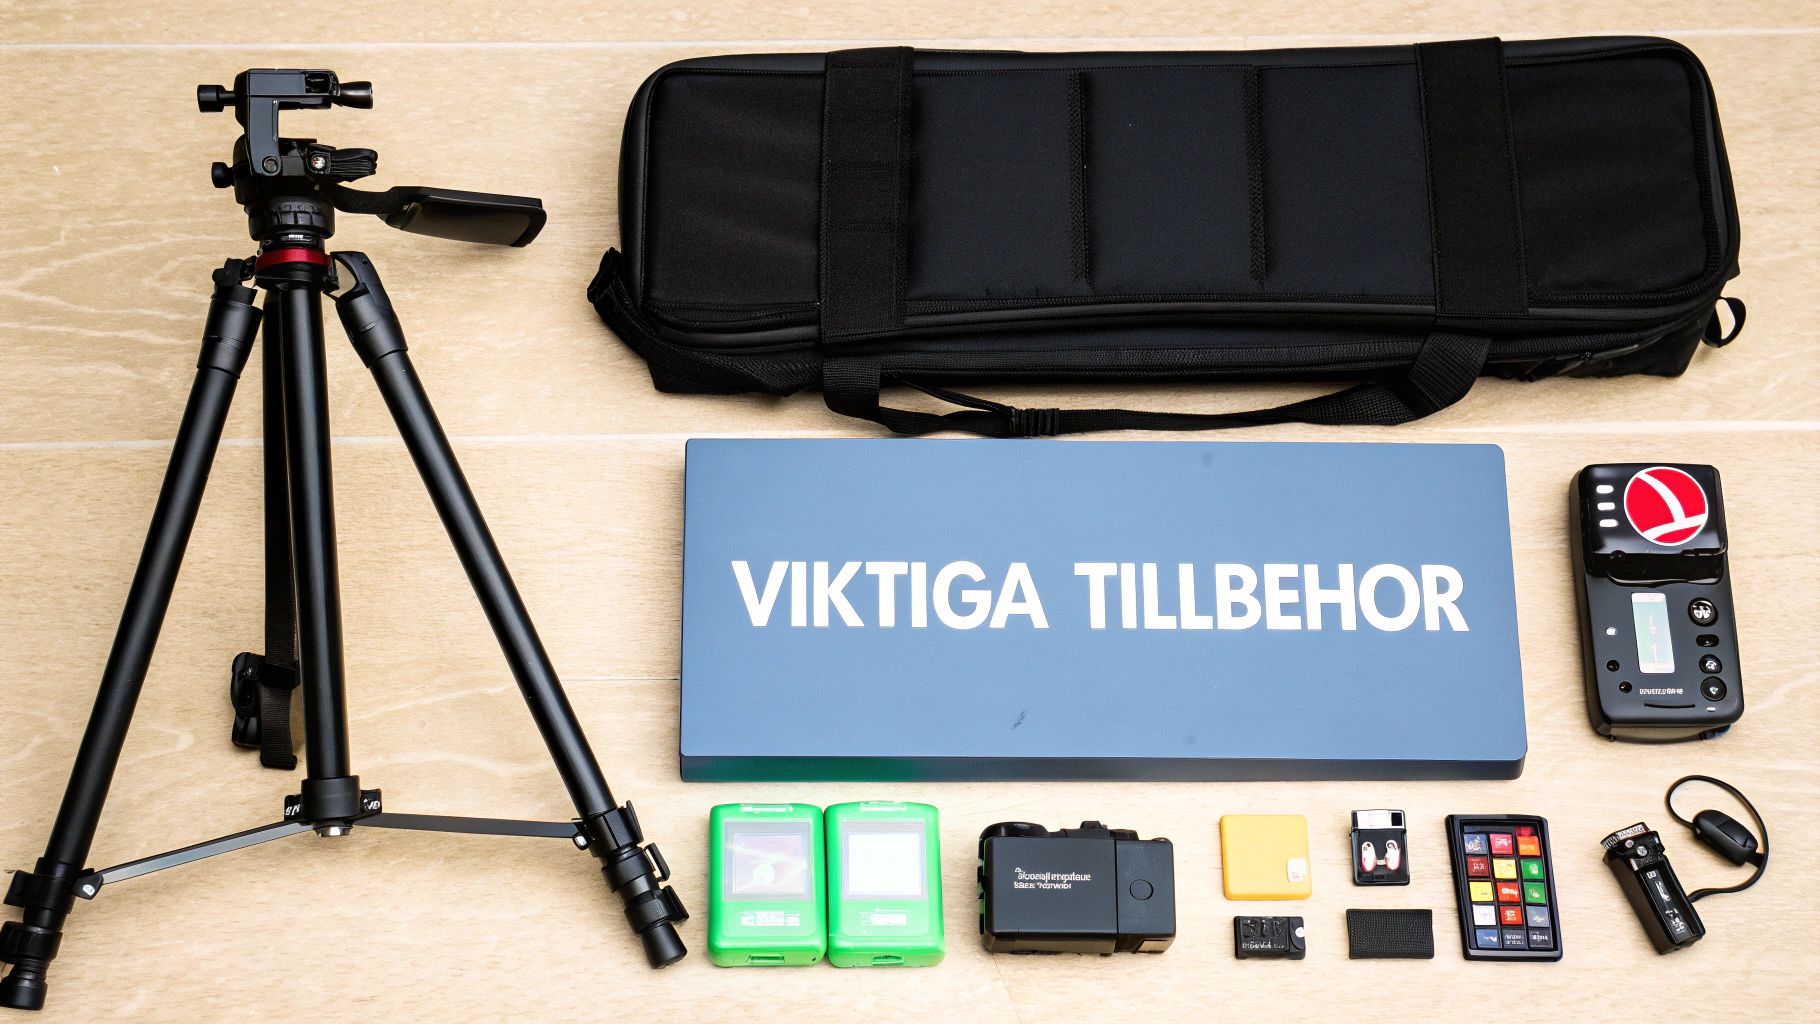
Accessories that elevate your photography
A sharp time lapse camera is a fantastic start, but it's the accessories that take your idea from good to truly impressive. The right equipment isn't a luxury—it's about eliminating problems and giving yourself the best possible chance of success.
The very first and most important accessory is a stable and robust tripod. Think of it as the camera's foundation. Even the smallest shake or vibration will be visible in the final result and can, in the worst case, ruin an entire video. Spend a little extra on a tripod that can handle some wind and won't sag during a long session.
Secure power and storage for long projects
Once the camera is standing steady, the next challenge is pure endurance. A time lapse project can span hours, days, or even weeks, putting enormous pressure on both battery and memory card.
-
Power Supply: Never rely solely on the camera's built-in battery for long takes. An external power bank with ample capacity or an AC adapter is practically mandatory. This ensures you don't miss the end of that magical sunset just because the battery died.
-
Memory Card: Shooting in RAW format gives you superior quality but also creates giant files. Choose a memory card with high capacity (at least 128 GB) and fast write speed (UHS-II is recommended). A fast card reduces the risk of the camera skipping frames because it's busy saving the previous one.
The feeling when the battery or storage space runs out in the middle of a project is incredibly frustrating. Prepare yourself with the right power and memory solutions so you can focus on the creative side instead.
Tools for creative control and movement
With the basics in place, it's time to explore accessories that give you more creative control and life in your films. These tools help you handle tricky lighting and add that professional touch.
An ND (Neutral Density) filter acts like sunglasses for your lens. It reduces the light hitting the sensor, allowing you to use longer shutter speeds even in the middle of the day. The result is beautiful motion blur that makes clouds and water look soft and dreamy.
To create dynamism, you can use a motorized slider or a panning head. These gadgets move the camera slowly and smoothly during the shoot, either sideways or sweeping across a view. This gives a much more cinematic and engaging feel to your finished video. If you want to see an example, check out this 360-degree automatic panoramic tripod that automates the process.
Last but not least, if your camera lacks a built-in time lapse function, an external intervalometer is the solution. This small remote connects to the camera and lets you set exact intervals and frame counts, giving you complete control over the entire process.
Frequently asked questions about time lapse photography
Once you start with time lapse, it won't be long before the first questions arise. That's completely natural. Here we have gathered answers to some of the most common concerns, from technical calculations to creative dilemmas, so you can spend less time troubleshooting and more time creating.
Getting the basics right is one thing, but truly mastering the craft is about understanding the details. Let's dive into some key areas that most people encounter sooner or later.
How do I calculate the length of my time lapse video?
Planning a time lapse involves a bit of math, but don't worry—the formula is dead simple. All you need are three key numbers to know exactly how long your finished film will be.
These are:
- Total recording time: How long you plan to let the camera stand and shoot (e.g., 2 hours).
- Interval: The time between each individual image (e.g., 10 seconds).
- Frame Rate (FPS): The number of images per second in the finished video, usually 24 or 30 FPS.
The formula looks like this: (Total recording time in seconds / Interval in seconds) / FPS = Video length in seconds.
Let's take an example: You shoot for 2 hours (7200 seconds) with an interval of 10 seconds. That gives you 720 images (7200 / 10). If your video is to be played at 24 FPS, the finished film will be 30 seconds long (720 / 24). Simple, right?
What does "holy grail" time lapse mean?
A "holy grail" is exactly what it sounds like—the ultimate goal in time lapse. It is the art of capturing a completely seamless transition from day to night (or vice versa) in a single take. It is a major challenge because the light changes dramatically during the process.
The trick is to gradually adjust camera settings like shutter speed and ISO as darkness falls or the sun rises. Some modern cameras have built-in functions for this, but mastering it completely manually is a true mark of skill.
A successful "holy grail" shows that you have full control over your equipment and a deep understanding of how light works.
How do I get rid of flicker in my video?
Flicker—those annoying, rapid jumps in brightness—is a classic beginner mistake. The problem almost always occurs when the camera is set to an auto mode. Between each frame, the camera makes tiny adjustments to the exposure, which creates disturbing flicker when the images are played in rapid succession.
The solution? Take full manual control.
- Set the camera to Manual Mode (M) and lock everything: shutter speed, aperture, ISO, and white balance.
- Turn off automatic lens functions like vignetting or distortion control directly in the camera.
By doing this, you ensure that every image is exposed exactly the same way. If you still get flicker, there are specialized software programs with "de-flicker" tools that can smooth out light levels afterward, but it's always best to get it right from the start.
Should I shoot in RAW or is JPEG enough?
If you want maximum quality and flexibility, there is only one answer: RAW. Think of a RAW file as a digital negative. It contains all the image information captured by the sensor, completely untouched and unprocessed.
This gives you incredible freedom in post-processing. You can adjust exposure, white balance, and colors without losing image quality. A JPEG, on the other hand, is already compressed and "developed" by the camera, which significantly limits your options. The downside of RAW is, of course, that the files are much larger, so make sure you have a memory card that can handle the job.
Are you ready to take your photography to the next level with the right gear? At ActionKing, you'll find the Nordic region's largest selection of accessories for your camera, from stable tripods to filters and powerful battery solutions. Explore the full range at https://actionking.se and find everything you need for your next adventure.


